
I'm super excited to welcome a special guest to the Muse blog today - Yuki, the talented designer behind indie pattern label Waffle Patterns, is here with a tutorial on how to make a hidden button stand for the Melissa dress!
With her Waffle Patterns label, Yuki blends together European and Japanese style and vintage inspiration to create unique and fun patterns. (I'm especially a fan of her coats - check out the pockets on the Pepernoot coat!)
Yuki made the Muse Melissa pattern up as a coat dress by lining it and lengthening the sleeves. She also changed the button placket into a hidden one, with a fold of fabric over the top. (I may have to copy her - I think I need a coat like this in my life! Or perhaps the blouse length Melissa in denim with long sleeves... Hmmm....)
Welcome Yuki! And over to you....
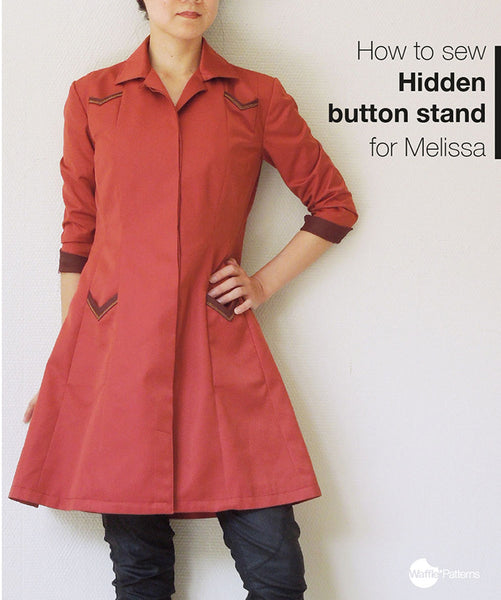
Hello, Kat and Muse Patterns’ fans. I’m so happy to join here! I recently tried Kat’s Melissa pattern. The pattern is made very cleverly, so you can sew shirt, skirt or dress from the one pattern. I modified some details and made it as a dress coat (check it on my blog).
Making as a dress coat, I changed the some details like sleeve length or lining. The biggest alteration is the front closure, I changed it to fly front (hidden button stand) type. This is not difficult at all, besides, adds clean and neat jacket-ish look. Here I want to share how to make it. Of course you can apply the same way to other garments!
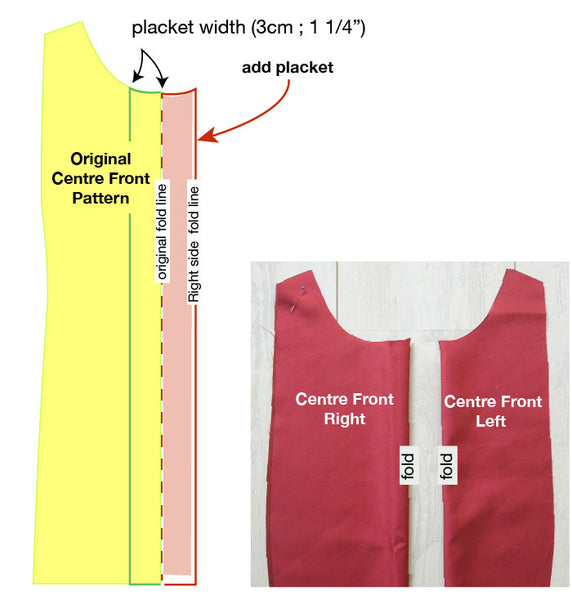
First, we adjust the Centre Front pattern piece, apply it only the right side of the bodice. This side will be the over-wrap side. Keep the Left side as the original.
Draw a vertical line along the front edge 3cm (1 1/4”) outside from the front edge (original fold line), and mirror copy the neckline curve and connect the line like the left side pic. This newly added edge will be the fold line on the right side piece. The original fold line remains as the front edge line as finishing shape. So, don’t forget mark these on the fabric. The added 3cm (1 1/4”) will be the width of the placket. I took 3cm, but you can choose any width as your preference.
Cut the fabric. you can see the Right side of the Centre Front pieces is wider than the Left side.
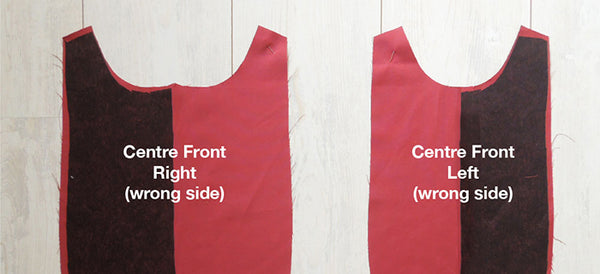
Put interfacing on the facing side same as the original instruction.
#2 Fold and crease the front edge
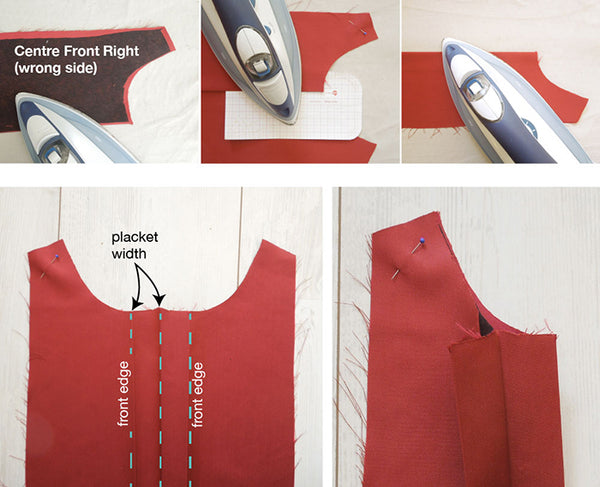
Fold and crease the right side front before sewing.
First, fold in half lengthwise the wrong side out, then fold the both side of the front edge line (3cm from the edge) right side out as finishing shape. It will turn like rotated “M” shape.
#3 Sew the under layer of the fold line
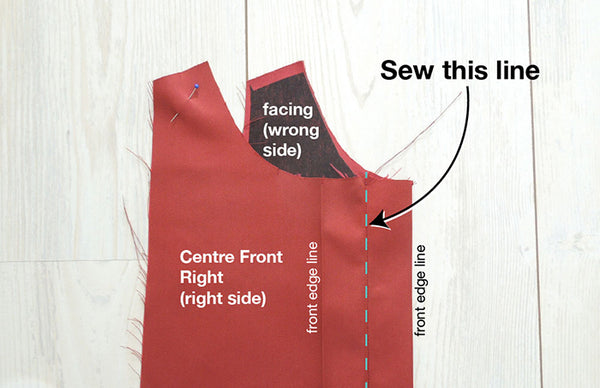
Fold along the front edge line on the facing side, sew the centre line. The right side area from the stitching line will be the under layer of the placket.
#4 Attach the collar

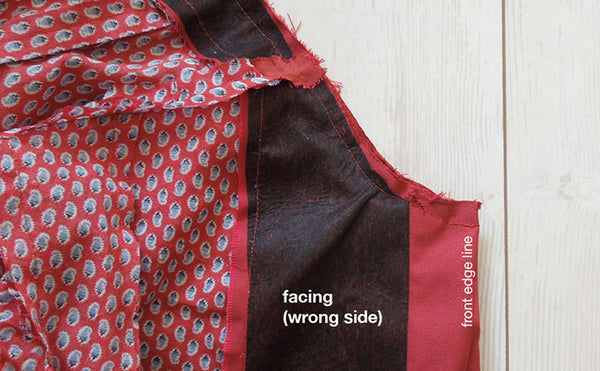
For attaching the collar, proceed the steps of the original instruction. (In this pic you can see the lining, but it's optional.)

Turn it to the right side and you'll see the upper front side is now doubled.
#5 Make button holes on the under layer

Make button holes on the under layer of the placket. I followed the original instruction for the placement. Put buttons on the under-wrap side of the bodice.
#6 Fix the upper and under placket
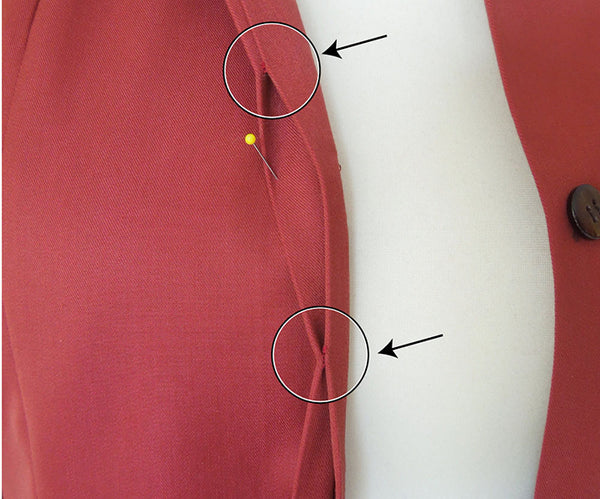
The upper layer is still flapping and looks not great. Fix the upper and under placket with blind stitches. Make some short length stitches like the pic (about 3mm - 1/8”). Put this between all button holes.
#7 Finishing

Here are small additional options. I put a pair of loop and button on the front upper edge and fix the front hem with topstitching. Apply them as your preference and you’re done!
Again I’m so happy to see Kat and many sewers here! I hope everyone enjoy the Sewing Indie Month!
Thank you so much Yuki! I love your Melissa coat, and I'm going to be using your tutorial to make myself one too. ;-)
If you're not familiar with Yuki's patterns, you should go and have a look - there are a lot of gorgeous designs.
Have you sewn the Melissa pattern? Will you be trying out the hidden button stand that Yuki used on her one?
Hi Virginia! The placket is enclosed in the hem, to give a nice and neat corner at the bottom. :)
How do you finish the hem of the dress? Is the placket enclosed in the hem like you did with the collar?
Leave a comment