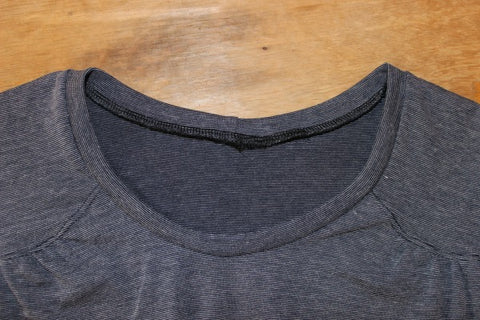
A couple of you have asked about turning the Jenna cardi pattern into a tshirt. Today, I'm going to show you how!
First up, gather your supplies. You'll need:
- The Jenna cardi pattern (in particular, the following pieces: front, back, front shoulder yoke (if making variation B), sleeve, neck band, cuff band if making the long sleeve or 3/4 sleeve variation, and hem band for the length you're wanting to make)
- Fabric and things to cut it with
- Tailors chalk
- Measuring tape or ruler
- If making a tshirt using variation B, you'll also need scissors (for cutting paper with) and sellotape

If you're making a tshirt - go down one size
Since the Jenna cardi is designed to be worn over other layers, you'll want to make it smaller if making a tshirt. I recommend going down one size - e.g. if you'd usually be a size 36, use a size 34 to make a tshirt.
If you're making variation B (shoulder yokes) as a tshirt - adjust the amount of gathering
The amount of gathering into the shoulder yoke for variation B of the Jenna cardi was designed so it would show up well when made in cardigan-weight fabrics. If you're wanting to convert the pattern into a tshirt, which will use thinner fabric, it will look better with less gathers. Here's how to adjust the gathers:
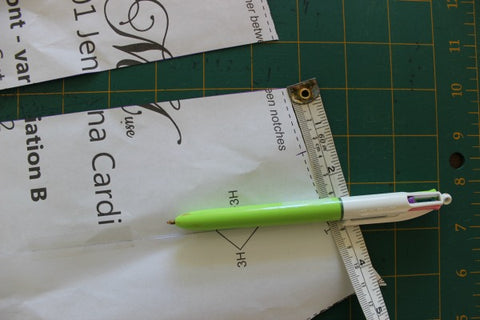
- Draw a line down the middle of the front pattern piece, from about half-way between the notches for gathering, right down to the bottom of the pattern piece.

- Cut along this line, stopping just before you reach the bottom (so the two halves of the pattern piece are still connected at the bottom)

- Measure 3.5cm from one side of your newly cut line and make a mark

- Take the other half of the pattern piece and overlap it until the edge lines up with the mark you just made. Tape it in place

Cutting out fabric - either variation, and as either a tshirt or a pullover
- Cut out the back and sleeve pieces as you would normally.
- Add 2cm length to the neckband - the easiest way to do this is measure 1cm from the fold of the fabric and place the edge of the neckband pattern piece here. Note: you won't need to transfer any of the markings from the pattern piece as we'll be using the quartering method to attach it to the neckline

- Cut out the front on the fold (Note: if making variation B, align the top and bottom of the centre front with the fold. The middle section will be inwards from the fold - this is fine, we're making this in a knit fabric after all and they're quite forgiving!)

- If adding a hem band, add 2cm length to the hem band pattern piece (again, measure 1cm from the fold of the fabric and place the edge of the hem band pattern piece here)
- If you're making a tshirt and don't want to have a hem band, instead add 6.5cm to the length of the front and back pieces. (If you're making variation B as a tshirt, the base of the front pattern piece won't be square any more after you adjusted the gathers. To make sure you're adding the right amount of length so that it matches the length of the back of the top, measure 6.5cm from the side seam and then square across to the centre front.)

Sewing up your top
Follow the instructions as for the Jenna cardi, until you get to attaching the neck band
Attaching the neck band
We're going to be using the quartering method for attaching the neck band (and also for the hem band, if you've chosen to use the hem band for your top).
- Sew together the short ends of the neck band, right sides together

- Fold the neckband in half, long side to long side, wrong sides together. Press. The seam you just made will now be fully enclosed
- Holding the seam at one end, lay the neckband flat. Place a pin at the other end. This pin marks the centre front of your neckband (the seam will be the centre back)

- Now rotate the neckband so the seam is over the pin you've just placed, keeping the the neckband laying flat. The seam and pin will be in the centre of the band. Place pins at either end of the neckband - these mark the quarter points of the neckband and will be used to make sure the band is evenly stretched around the neck of your top

- Lay your top flat, with the shoulder seams on top of each other. Place pins at the edges of the neckline - these are the centre front and centre back points

- Again, lay your top flat, this time with the two pins you've just place on top of one another. Place pins at the edges of the neckline - these are your quarter points

- Place the neckband on the neck of your top, with the neckband against the right side of the top and all the raw edges lined up. Match the pins of your neckband with those of the top's neck, making sure the centre back pin on the top's neck is aligned with the seam of the neckband. Pin in place at the four quarter marks (i.e. where the pins are)

- Gently stretch the neckband to fit the neck of your top, pinning in place
- Sew the neckband to the top, using a 1cm seam allowance. Neaten edges.
- Open out the neckband and press the seam allowance down towards the top

- If you wish to, you can top stitch the seam allowance down, a couple of mm away from the seam line
Attaching the hem band
Attach the hem band in the same way as you've just attached the neckband, only this time aligning the seam of the hem band with one of the side seams of the top.
Hemming your top (if not using a hem band)
If you've chosen not to use a hem band, neaten the bottom edge of your top then fold under 1.5cm and press. Stitch in place.
And you're done! Enjoy your new top.


Hi Catherine,
Using the binding from the Natalie pattern is a great idea! You will need to make sure the neckline is the same on your v-neck Jenna top to ensure it fits – if you place your Natalie pattern over the Jenna you can redraw the neckline using the Natalie to get the vee shape, and then the binding will be the right fit without needing to make any adjustments. :-)
Thanks!
Kat @ Muse Patterns
I’d like to make the v-neck view B Jenna as a t-shirt (hip length). I understand how to make the changes, except the neck binding. Is there a way to figure binding for a v-neck? Can I use the binding piece from my Natalie pattern?
Thanks!
Hi Imogheena – since the Jenna is a knit top, it’ll be quite easy to adjust to your torso length. You may find you don’t need to adjust it all that much length-wise, as the majority of the addition length for the height is found in the arms (and in the skirt length on patterns such as the Gillian and the Natalie).
On the pattern, you’ll see that the side seams curve in – the narrowest part is meant to hit at your waist. If you square across from there to the centre back seam, then measure up to the back neckline, you can compare this measurement with your waist-to-nape measurement, and see how much you need to shorten it by. Then simply fold out the excess length from about half-way between the underarm and the waist, and smooth the line. You’ll need to remove the same amount from the button bands as well.
Remember to check the sleeve length too if you’re making the long sleeved version – you’ll likely find they’re quite a bit longer than you need, so you may be able to save some fabric while cutting out. :-)
This is great! Just what I wanted to do to this pattern :-)
However I took a look at your sizing and it’s for someone 177cm tall. ARGH! I’m all of 161cm, (with a proportionately short torso). How likely is it that I could adjust the pattern for my short stature without ruining the delicious design lines?
Love this! Especially the retro styling of the yoke. Defs going to be making one of these!
Leave a comment